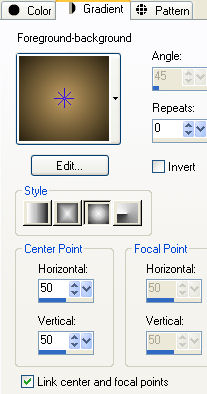
Preparation Open the mask "Narah_mask_0708" on psp and minimize to icon Materials palette: Foreground color light on #c19d61 and the Background color dark on #292110 Set the foreground to style sunburst:
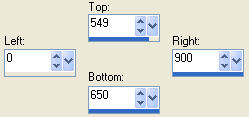
1. Open a new transparent image of 900 x 650 px. Flood fill the layer with the gradient. 2. Effects/Edge Effects/Enhance more. Effects/Plugins/FunHouse/Xaggerate: 24 / 24. 3. Activate the Selection tool and choose the custom selection:
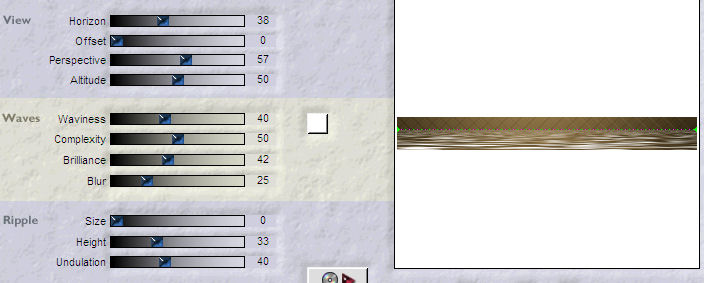
Layers/New Raster Layer. Flood fill the selection with the gradient. Effects/Reflection Effects/Feedback:
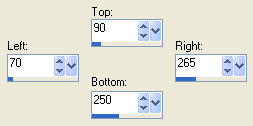
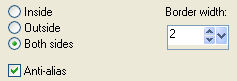
4. Selections/Modify/Select/Selection Borders:
Layers/New Raster Layer. Flood fill the selection with the background color. Effects/Artistic Effects/Enamel (your light color):
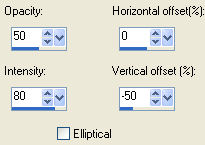
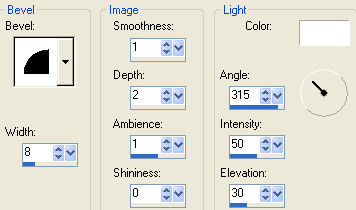
Effects/3D Effects/Inner Bevel (#ffffff):
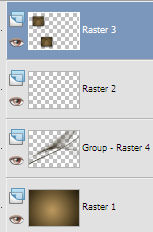
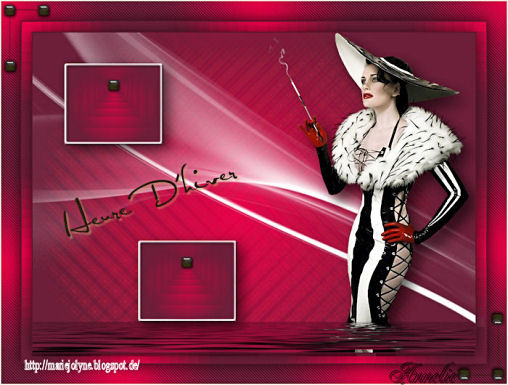
Selections/Select none. Effects/3D Effects/Drop Shadow: 2 / 2 / 60 / 4 / #000000. Layers/Merge/Merge down. Effects/3D Effects/Drop Shadow: 10 / 10 / 60 / 40 / #000000. 5. Layers/Duplicate. Effects/Image Effects/Offset: horiz. 150 / vert. -360 / custom and transparent. Open the tube "Déco VSP1 Heure d'Hiver". Edit/Copy and paste as new layer. Effects/Image Effects/Offset: horiz. -207 / vert. 10 / custom and transparent. Layers/Merge/Merge down twice. Edit/Cut and paste as new layer. Effects/Image Effects/Offset: horiz. -200 / vert. -7 / custom and transparent. 6. Activate the Raster 1. Layers/New Raster Layer. Flood fill the layer with the background color. Layers/New mask layer/From image and choose "Narah_mask_0708": marquer uniquement source luminance. Layers/Merge/Merge group. Image/Mirror. 7. Activate the top layer (Raster 3):
Open the tube of woman "Gabry-woman 872". Edit/Copy and paste as new layer. Image/Resize to 75% (all layers not checked). Image/Mirror. Adjust/Sharpness/Sharpen. Effects/Image Effects/Offset: horiz. 223 / vert. 5 / custom and transparent. Effects/3D Effects/Drop Shadow: 15 / 15 / 60 / 40 / #000000. 8. Activate the Selection tool and choose the custom selection:
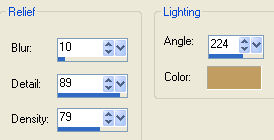
Activate the layer Raster 1. Effects/Plugins/Flaming Pear/Flood:
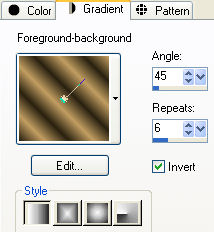
Activate the layer Raster 4. Effects/Plugins/Flaming Pear/Flood: settings in memory. Selections/Select none. 9. Open the tube "Titre VSP heure d'hiver". Edit/Copy and paste as new layer. Effects/Image Effects/Offset: horiz. -207 / vert. -20 / custom and transparent. 10. Image/Add borders symmetric of 2 px dark color. Selections/Select all. Image/Add borders symmetric of 20 px light color. Selections/Invert. In your materials palette set the foreground to style linear:
Flood fill the selection with the gradient. Effects/Distortion Effects/Pixelate:
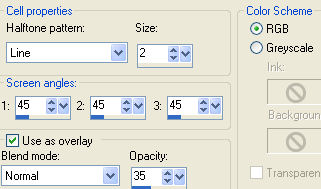
Selections/Invert. Effects/3D Effects/Drop Shadow: 0 / 0 / 60 / 40 / #000000. Selections/Select none. 11. Image/Add borders symmetric of 2 px dark color. Selections/Select all. Image/Add borders symmetric of 40 px light color. Selections/Invert. Flood fill the selection with the gradient. Adjust/Blur/Gaussian Blur: radius 25. Effects/Artistic Effects/Halftone:
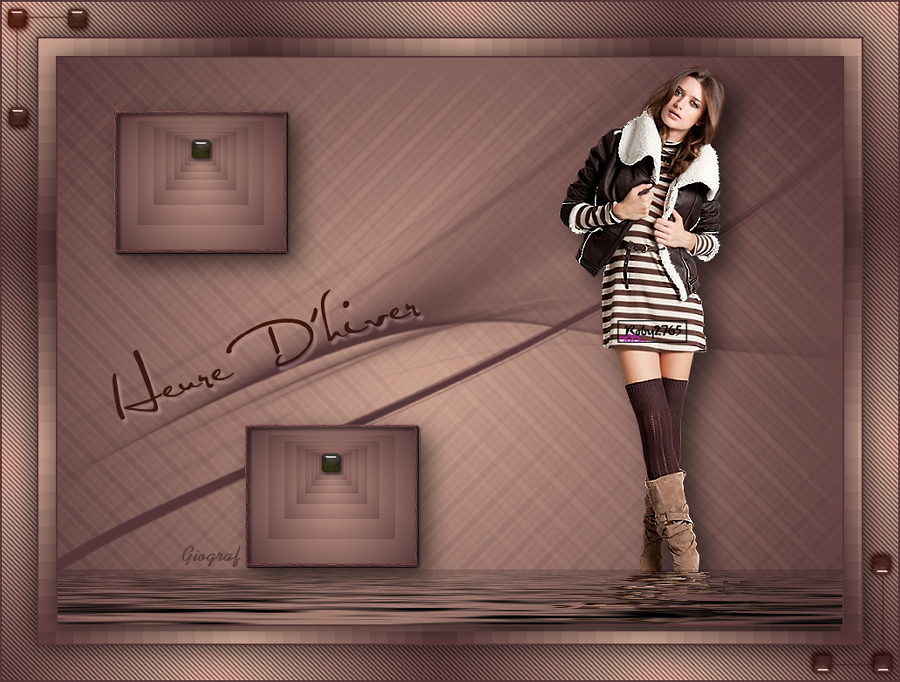
Selections/Invert. Effects/3D Effects/Drop Shadow: settings in memory. Selections/Select none. Image/Add borders symmetric of 2 px dark color. Open the tube "Déco VSP2 Heure d'Hiver". Edit/Copy and paste as new layer. 12. Add your signature. Layers/Merge/Merge all (Flatten). 13. Image/Resize to 900 px of width. Adjust/Sharpness/Sharpen. Save as jpeg file. La bellissima versione della mia tester Giograf - Grazie
La bellissima versione di Annelie - Grazie
Tutorial translated by Byllina the 3 november 2014 |